

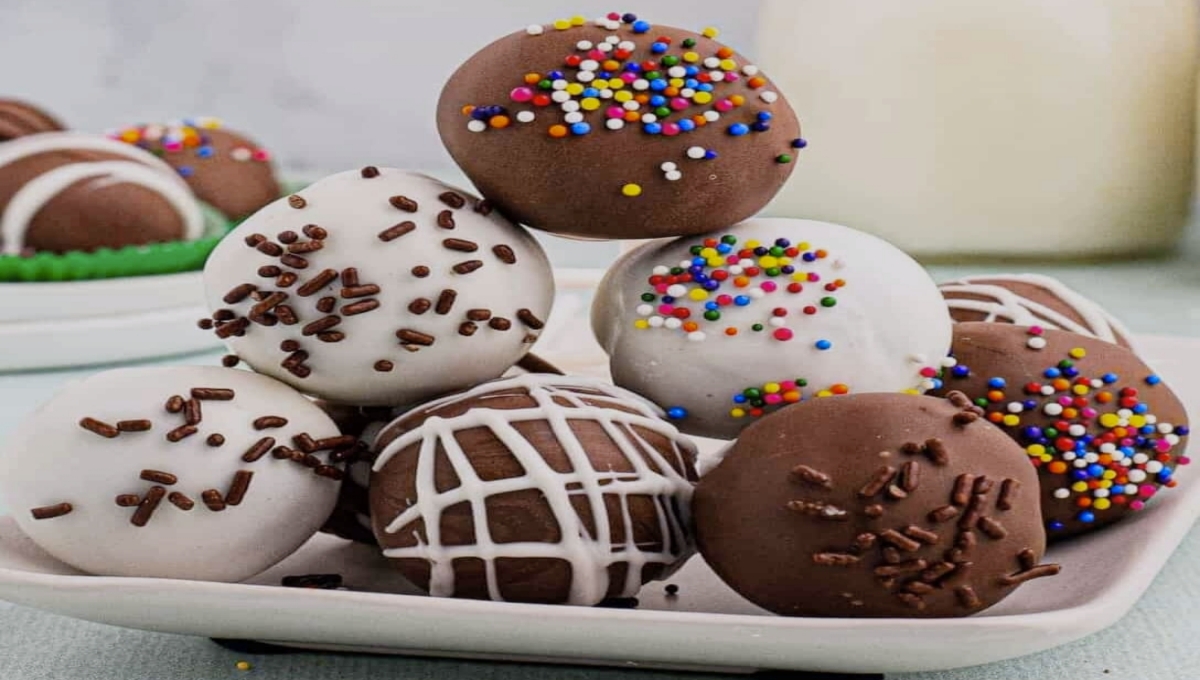
Chocolate Pop Cake Recipe: For a delicious chocolate pop cake, combine chocolate cake mix with eggs, oil, and water. Bake, crumble, and mix with frosting, then form into balls and dip in chocolate.
Chocolate pop cakes are a delightful treat for any occasion. These bite-sized desserts combine the rich flavors of chocolate cake with smooth frosting, all coated in a luscious chocolate shell. Perfect for parties, celebrations, or just a sweet indulgence, they appeal to kids and adults alike.
The process is straightforward, making it an ideal recipe for bakers of all skill levels. Whether you’re hosting a birthday party or want to satisfy your sweet tooth, chocolate pop cakes will impress. Prepare to enjoy a fun and delicious dessert that’s as enjoyable to make as it is to eat!
Introduction To Chocolate Pop Cakes
Chocolate Pop Cakes are a delightful treat. They combine the joy of cake with the fun of pops. Perfect for parties or casual snacking, these bites are loved by all. Let’s dive into their fascinating origins and reasons for their popularity.
Origins Of The Pop Cake Trend
The trend of pop cakes began in the early 2000s. They emerged as a fun way to enjoy cake. Bakeries started using cake pops for celebrations and events. These treats quickly gained popularity through social media. Their cute appearance and portability made them a hit.
Here are some key points about their origins:
- First introduced by cake artists.
- Gained fame on platforms like Instagram and Pinterest.
- Perfect for birthdays, weddings, and other celebrations.
Why Chocolate Pop Cakes?
Chocolate Pop Cakes offer a rich, indulgent experience. They satisfy chocolate cravings in a fun way. Here are some reasons to love them:
- Easy to Make: Simple ingredients create a delicious treat.
- Customizable: Decorate with sprinkles, frosting, or chocolate.
- Portable: Great for on-the-go snacking.
- Fun for Kids: Perfect for baking with children.
These cakes are not just tasty; they are also a creative outlet. Get ready to explore different flavors and designs!
Essential Ingredients
Creating the perfect Chocolate Pop Cake requires the right ingredients. These components ensure your cake is moist, flavorful, and fun to eat. Focus on each part for the best results.
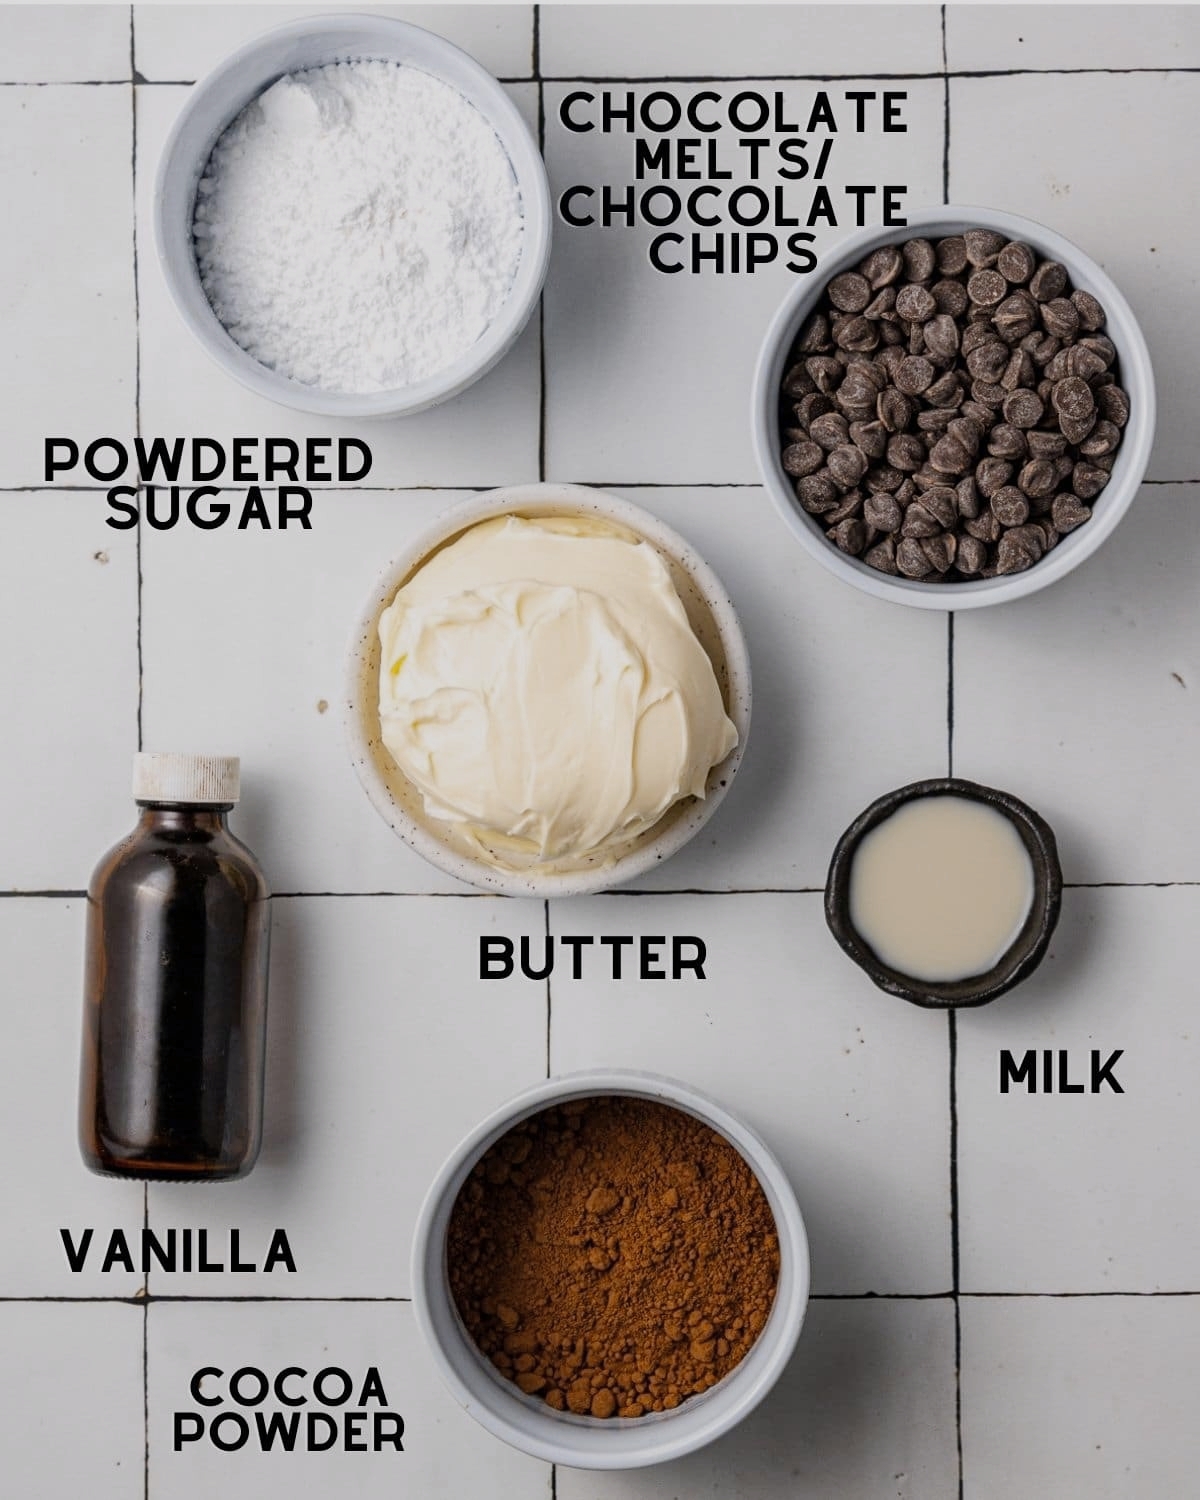
Choosing The Right Chocolate
Chocolate is the star of your cake. Select high-quality chocolate for the best flavor. Here are some options:
- Dark Chocolate: Rich and slightly bitter.
- Milk Chocolate: Creamy and sweet.
- White Chocolate: Sweet and buttery.
Use chocolate chips or bars. Both work well in your recipe.
Base Cake Selection
The base cake is crucial for texture. Choose a recipe that suits your taste. Here are some popular choices:
| Type of Cake | Flavor Profile |
|---|---|
| Chocolate Cake | Rich and decadent |
| Vanilla Cake | Light and fluffy |
| Red Velvet Cake | Chocolate with a hint of vanilla |
Pick a cake that complements your chocolate choice.
Binders And Frostings
Binders hold your cake together. Common options include:
- Eggs: Provide structure and moisture.
- Applesauce: Adds moisture without extra fat.
- Yogurt: Creates a tender crumb.
Frosting adds flavor and decoration. Popular choices are:
- Chocolate Buttercream: Rich and creamy.
- Whipped Cream: Light and fluffy.
- Ganache: Smooth and shiny.
Experiment with different combinations for unique flavors.
Tools And Equipment Needed
Creating a delightful chocolate pop cake requires specific tools. The right equipment makes the process easier and more fun. Here’s what you need to get started!
Molds And Shaping Tools
Choosing the right molds is essential for perfect cake pops. Here are some must-have items:
- Cake Pop Molds: These molds help shape your cake pops.
- Silicone Molds: Flexible and easy to use for different shapes.
- Cookie Cutters: For unique designs and fun shapes.
- Spatula: Helps to smooth out the cake mixture.
Use these tools to create stunning cake pops. Experiment with different shapes and sizes!
Decorating Supplies
Decorating your cake pops makes them look amazing. Here’s a list of supplies you need:
| Supply | Purpose |
|---|---|
| Chocolate Coating: | For a smooth, delicious outer layer. |
| Sprinkles: | Add color and fun to your cake pops. |
| Food Coloring: | Create vibrant designs and themes. |
| Lollipop Sticks: | Essential for holding your cake pops. |
| Decorative Bags: | Perfect for gift wrapping your cake pops. |
Use these decorating supplies to make your cake pops eye-catching. Let your creativity shine!
Step-by-step Baking Guide
Creating a delightful Chocolate Pop Cake is easy. Follow this step-by-step guide. You will make a delicious cake, melt chocolate, and assemble it perfectly.
Preparing The Base Cake
Start with a simple cake recipe. Here are the ingredients:
| Ingredient | Amount |
|---|---|
| All-purpose flour | 2 cups |
| Sugar | 1 ½ cups |
| Cocoa powder | ¾ cup |
| Baking powder | 1 ½ tsp |
| Salt | ½ tsp |
| Eggs | 2 |
| Milk | 1 cup |
| Vegetable oil | ½ cup |
| Vanilla extract | 2 tsp |
- Preheat the oven to 350°F (175°C).
- Grease and flour two 9-inch round cake pans.
- In a bowl, mix flour, sugar, cocoa, baking powder, and salt.
- Add eggs, milk, oil, and vanilla. Mix until smooth.
- Pour batter into prepared pans.
- Bake for 30-35 minutes. Check with a toothpick.
- Let cakes cool for 10 minutes. Remove from pans.
Melting Chocolate To Perfection
Melting chocolate is a key step. Use high-quality chocolate for the best flavor. Here’s how:
- Chop chocolate into small pieces.
- Use a microwave-safe bowl.
- Microwave in 30-second intervals. Stir after each interval.
- Stop when the chocolate is mostly melted. Stir until smooth.
For a double boiler method:
- Fill a pot with water. Bring to a simmer.
- Place a heatproof bowl over the pot. Make sure it doesn’t touch water.
- Add chocolate to the bowl. Stir until melted.
Use melted chocolate to coat the cake pops. Enjoy your delicious creation!
Assembling Your Chocolate Pop Cakes
Assembling your chocolate pop cakes is a fun and creative process. Follow these simple steps to create delicious treats that everyone will love. The key steps include creating cake balls and mastering dipping techniques.
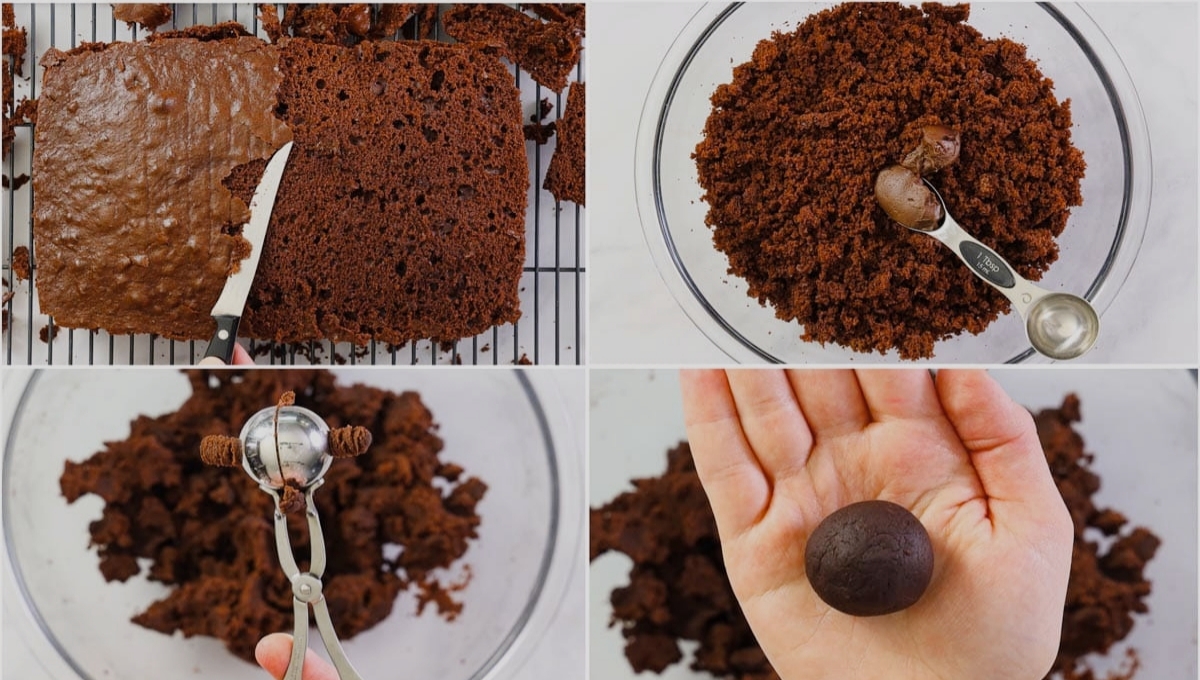
Creating The Cake Balls
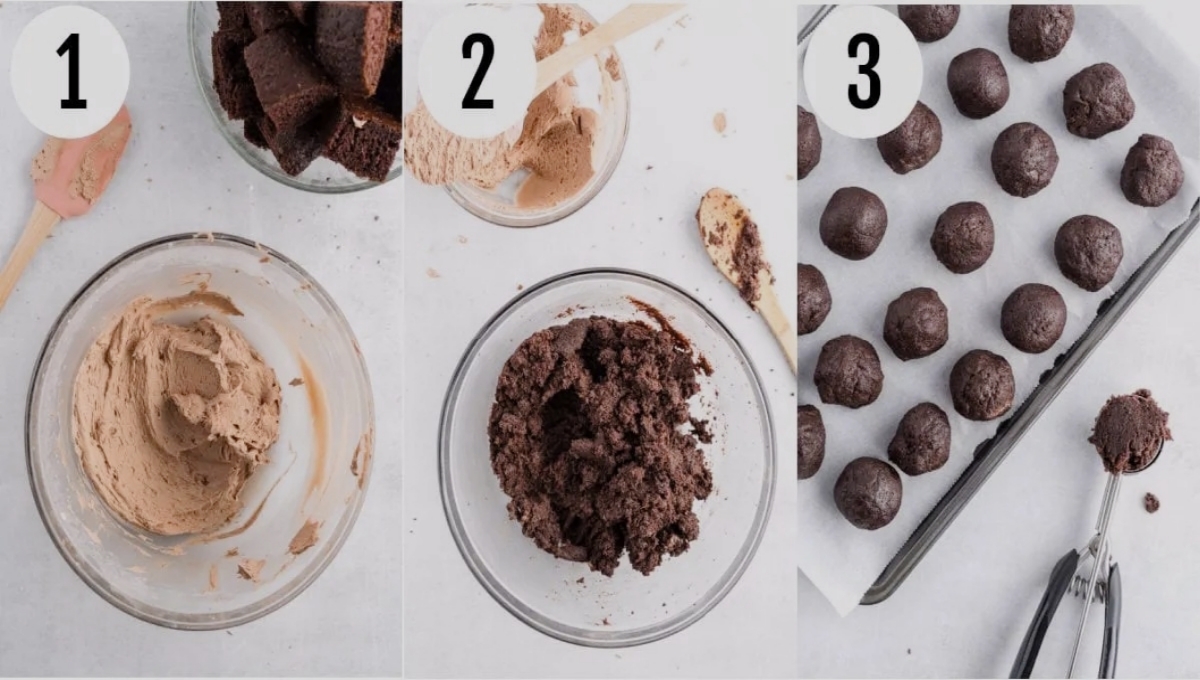
Start with a cooled, crumbled cake. Use chocolate cake for a rich flavor. Follow these steps:
- Prepare the Cake: Bake your favorite chocolate cake. Allow it to cool completely.
- Crumble the Cake: Break the cake into fine crumbs using your hands or a food processor.
- Add Frosting: Mix in about 1 cup of frosting. Use a chocolate or cream cheese frosting for extra flavor.
- Form Balls: Roll the mixture into small balls, about 1 inch in diameter. Place them on a baking sheet.
- Chill the Balls: Refrigerate for at least 30 minutes. This helps them hold their shape.
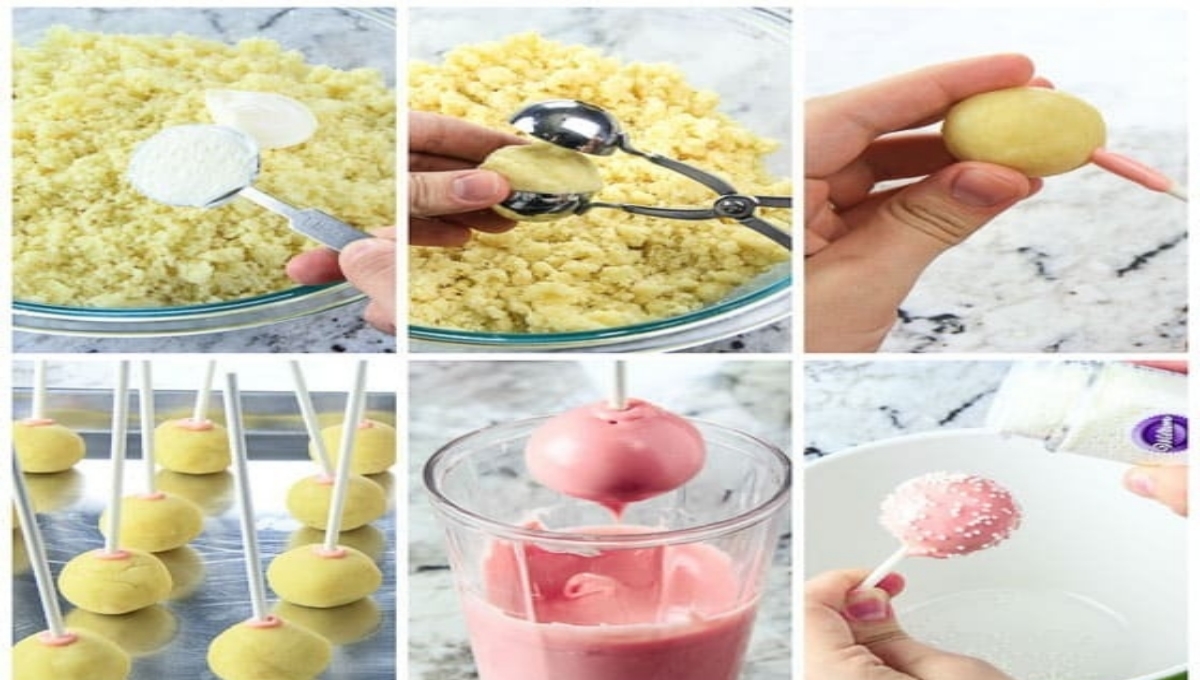
Dipping And Coating Techniques
Dipping and coating your cake balls is where the magic happens. Here’s how to do it right:
- Choose Your Coating: Use melted chocolate, candy melts, or chocolate bark.
- Prepare for Dipping: Melt your coating in the microwave. Stir until smooth.
- Insert Sticks: Dip a lollipop stick into the coating. Insert it into each cake ball.
- Dip the Cake Balls: Fully immerse each ball into the melted coating. Tap off excess chocolate.
- Add Sprinkles: Before the coating sets, sprinkle with toppings. Use colorful sprinkles or crushed nuts.
Use these tips to assemble beautiful and tasty chocolate pop cakes. Enjoy the process and share your creations!
Decorative Tips And Tricks
Decorating your Chocolate Pop Cake can be fun and easy. With a few creative ideas, you can make your cake truly special. Here are some tips to help you shine.
Adding Personal Touches
Personalizing your cake adds charm. Here are some ideas:
- Custom Colors: Use colored melts for a unique look.
- Names and Messages: Write names with icing on pops.
- Pictures: Use edible images for birthdays or events.
Theme Ideas For Special Occasions
Choose a theme to make your cake stand out. Here are some fun themes:
| Occasion | Theme | Decoration Ideas |
|---|---|---|
| Birthday | Rainbow | Bright sprinkles and colorful melts |
| Wedding | Elegant White | White chocolate and silver edible beads |
| Halloween | Spooky | Black and orange colors, ghost decorations |
| Christmas | Festive | Red and green icing, candy canes |
Pick a theme that suits your occasion. Use decorations that match the mood. This makes your cake memorable.
Storing And Serving Suggestions
Proper storage and serving methods enhance the flavor of your Chocolate Pop Cake. Follow these tips for the best results.
Best Practices For Freshness
To keep your Chocolate Pop Cake fresh, follow these guidelines:
- Refrigerate: Store in an airtight container in the fridge.
- Freeze: Wrap individual cake pops in plastic wrap. Place in a freezer bag.
- Room Temperature: Enjoy within 2 days if kept at room temperature.
Check for any signs of spoilage before serving. Proper storage helps maintain flavor and texture.
Presentation Ideas
Make your Chocolate Pop Cake visually appealing with these creative ideas:
- Colorful Sticks: Use vibrant lollipop sticks for a fun look.
- Decorative Wrapping: Wrap in clear cellophane with colorful ribbons.
- Serving Stand: Arrange on a tiered cake stand for height.
- Garnishes: Add sprinkles or edible glitter for a festive touch.
Serve with a variety of dipping sauces. Options like caramel or chocolate sauce add extra flavor.
Common Mistakes To Avoid
Making chocolate pop cakes can be fun and rewarding. Avoiding common mistakes helps ensure success. Here are some tips to keep your cake pops delicious and beautiful.
Troubleshooting The Cake Pop Process
Many issues can arise during the cake pop process. Here are the most common problems:
| Problem | Solution |
|---|---|
| Crumbly Cake | Add more frosting to bind the cake. |
| Melting Chocolate | Use chocolate chips and melt slowly. |
| Sticking to the Stick | Dip the stick in chocolate before inserting. |
| Uneven Coating | Use a fork to roll the pop in the chocolate. |
Ensuring Consistent Quality
Consistency is key for perfect cake pops. Follow these tips:
- Measure Ingredients carefully for accurate results.
- Chill the Dough before shaping it to prevent melting.
- Use Quality Chocolate for better taste and texture.
- Maintain the Temperature of melted chocolate for smooth coating.
- Practice Uniform Size for even baking and coating.
Keep these tips in mind. Success with chocolate pop cakes will be sweet!
Nutritional Information And Dietary Adaptations
Understanding the nutritional value of your food is important. This section highlights the caloric content and options for dietary restrictions. Enjoying treats like chocolate pop cakes can fit into various dietary plans.
Caloric Content Breakdown
The caloric content of a chocolate pop cake varies based on the ingredients. Here’s a simple breakdown of the calories:
| Ingredient | Serving Size | Calories |
|---|---|---|
| Chocolate Cake Mix | 1 cup | 400 |
| Eggs | 2 large | 140 |
| Butter | 1/2 cup | 800 |
| Chocolate Frosting | 1/4 cup | 200 |
| Sprinkles | 2 tablespoons | 50 |
The total calories per pop cake can reach around 1,590. Adjusting portion sizes helps manage calorie intake.
Alternatives For Dietary Restrictions
Many people have dietary needs. Here are some alternatives to consider:
- Gluten-Free: Use a gluten-free cake mix.
- Dairy-Free: Substitute butter with coconut oil.
- Egg-Free: Replace eggs with applesauce or flaxseed.
- Low-Sugar: Use sugar substitutes like stevia or erythritol.
- Vegan: Combine the above options for a fully vegan cake.
These alternatives ensure everyone can enjoy chocolate pop cakes. Tailor the recipe to fit your dietary needs.
Engaging With Your Audience
Connecting with your audience makes sharing a Chocolate Pop Cake recipe exciting. It invites others to create and share their experiences. Let’s explore how to engage effectively.
Sharing Your Creations Online
Social media platforms are perfect for sharing your Chocolate Pop Cake creations. Here are some tips:
- Use eye-catching photos: Bright, clear images attract attention.
- Create a unique hashtag: Encourage others to use it.
- Invite comments and questions: Engage with your audience.
Consider using a simple table to summarize your sharing strategy:
| Platform | Content-Type | Engagement Tip |
|---|---|---|
| Photos and Stories | Use polls to gather opinions. | |
| Posts and Groups | Start discussions about favorite flavors. | |
| Recipe Pins | Encourage saves and shares. |
Hosting A Chocolate Pop Cake Party
Hosting a party can make your Chocolate Pop Cake experience even better. Here are steps to organize a fun event:
- Choose a date: Pick a day that works for everyone.
- Send invitations: Use digital invites for easy access.
- Prepare your ingredients: Gather all supplies in advance.
- Set up a decorating station: Provide sprinkles, icing, and more.
- Encourage creativity: Let guests decorate their cakes.
At the end of the party, enjoy tasting everyone’s creations. Celebrate each unique Chocolate Pop Cake.
FAQs About: Chocolate Pop Cake Recipe:
What Is A Chocolate Pop Cake?
A chocolate pop cake is a fun dessert made from chocolate cake crumbs mixed with frosting and shaped into balls. These are then dipped in chocolate and placed on sticks. They are perfect for parties and celebrations due to their bite-sized nature and delightful presentation.
How Do I Make Chocolate Pop Cake?
To make a chocolate pop cake, first, bake a chocolate cake and crumble it once cooled. Mix the crumbs with frosting until the mixture is moldable. Form into balls, chill, and then dip in melted chocolate. Insert sticks and let them set before serving.
Enjoy this delicious treat!
Can I Use Store-bought Cake For Pops?
Yes, you can use store-bought cake to make chocolate pop cakes. Just crumble the cake and mix it with frosting. This saves time and still results in delicious pops. Customize with your favorite flavors or toppings for a unique twist!
How Long Do Chocolate Pops Last?
Chocolate pops can last about 3 to 5 days when stored properly. Keep them in an airtight container at room temperature. For longer freshness, refrigerate them, but allow them to come to room temperature before serving for the best taste.
YouTube Video Tutorial: Click Here
Conclusion
Creating a chocolate pop cake is a fun and delicious way to impress friends and family. This recipe is simple and perfect for any occasion. Enjoy the rich flavors and delightful textures that make this treat irresistible. Try it out and share your delightful creations with others.
Happy baking!